Hi to everyone and thank you to all those who wished me a speedy recovery.
I’ve been out of action since mid November and happy to get back into a bit of turning and woodworking. According to my family I’ve been a grumpy old bugger with a bit of memory loss and repeating myself. Hey…..no chocolate, alcohol,not aloud to drive and no independence ( it’s not ………………. rocket science is it????? )
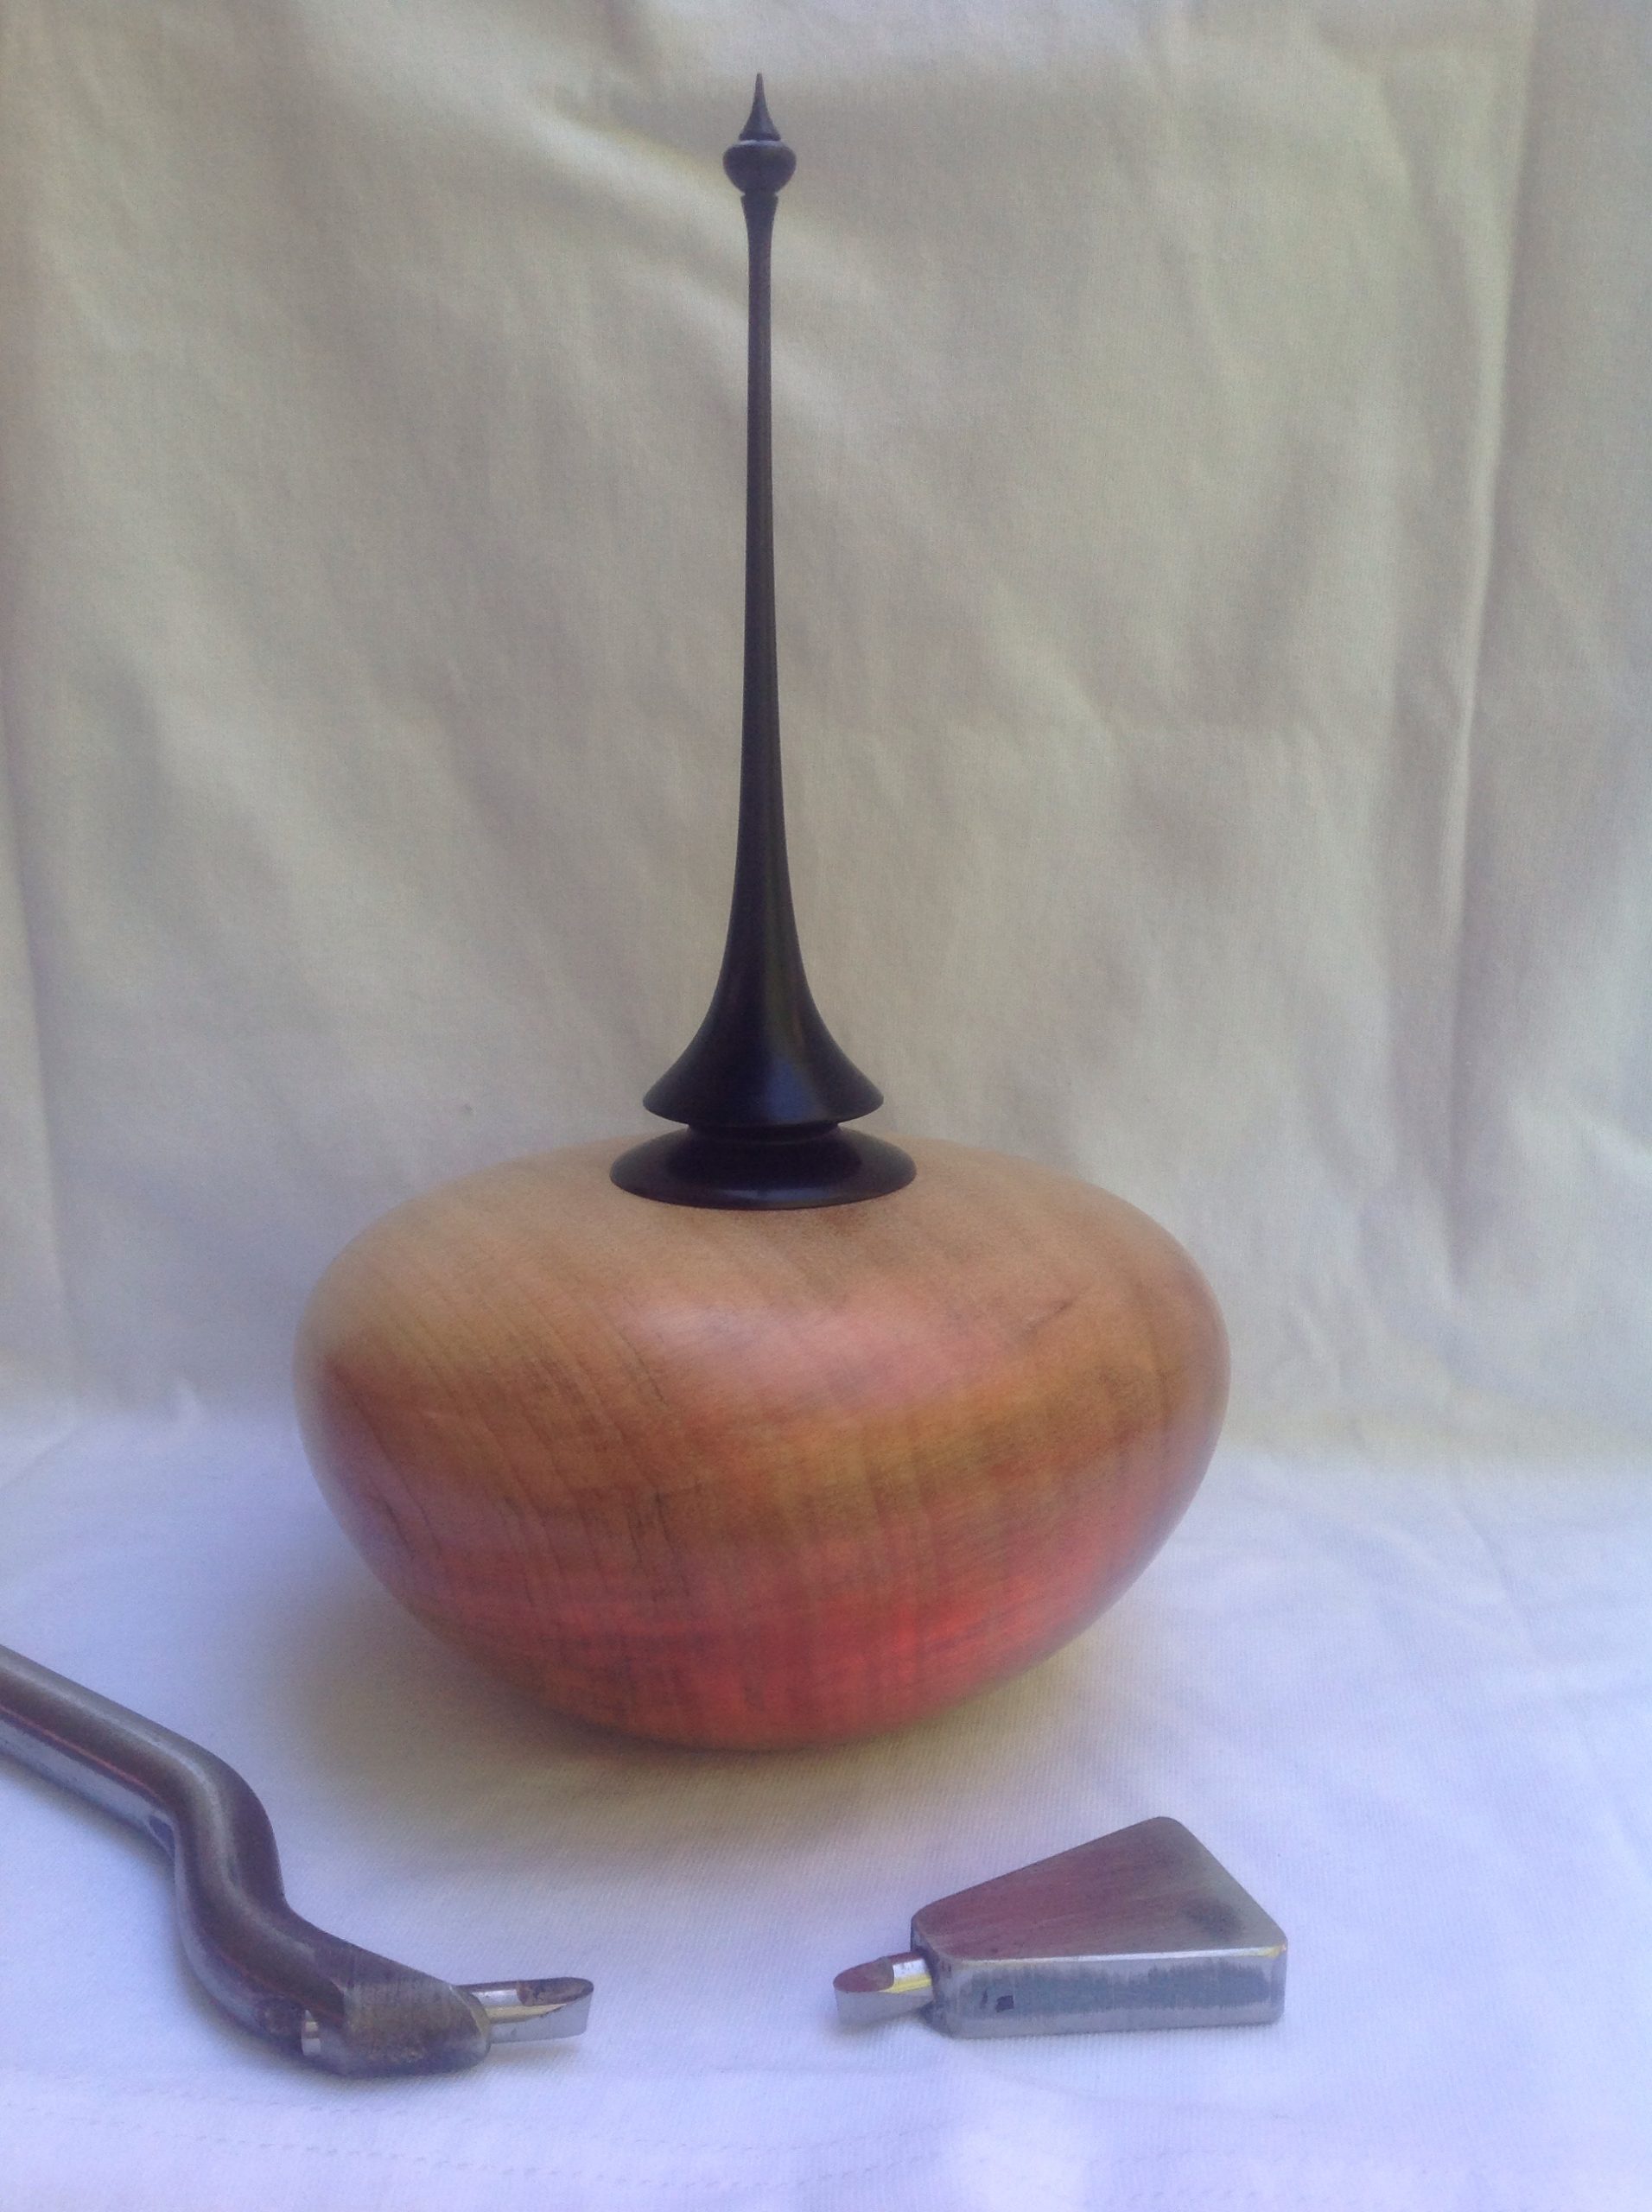
Anyway back on track. I turned the H/F (hollow form) above and like all the pieces displayed on the WoW (World of Woodturners) I gave it a name. It’s a piece of Kauri Pine both the bowl and finial finished with clear shellac the finial dyed with japan black.
The red glow you see is LED lights inside to demo the even wall thickness inside which I achieved with that fantastic absolutely amazing hollow tool shown in the foreground. Once you become familiar with its simplicity it’s an absolute dream to use. To sharpen the bit is just short of ingenious allowing you to shape and set the cutting angle to suit your turning.
After roughing out the inside I sharpened the cutter to do a finishing cut and used the new negative rake scraper bit which I ground to a special curved shape to suit the profile. Amazing………just amazing it levelled off all the high spots cutting the inside with whisper thin shavings. I started sanding the inside with 240 grit paper, not bad ah, considering your working blind.
A list of pointers you may find useful .
Alway keep tool level and dead on centre line
The default cutting angle is around 9 degrees. If you find the bit grabs reduce the angle. Grind the angle that best suits the timber and shape. If you rotate the tool slightly upwards you should start to rub the bevel. Remember different diameters will give you different results which comes back to grind to suit what you are turning.
Keep the point of the bit roughly on the shaft centre line. However I found that if you extend it further out you get a better reach just behind the entry hole.
Keep the straight shaft on the tool rest . The hook on the tool rest is a really big NO NO.
Work on a 1:5 ratio. If the cutting tip is 100mm over the tool rest your hand should be 500mm behind the tool rest. That’s the beauty of these tools, you buy them with the tool holder and make your own personal handle. One of my handles is 750mm long to suit the 5/8 bar.
Start with open hollows so you can see what and how you’re using the tool,learn to understand it, get the feel of how it cuts before you get into blind forms.
Keep the cutting sharp. Stone the top edge or grind using a felt pen and only taking off the bare minimum.
Most important: have fun!!
Cheers Gerald Rensen. aka BigG’